
Tags
Many years ago, when we took the trip of a lifetime to Tokyo, I was mesmerized by everything. I had never been to the orient and found everything Japanese to be astounding.
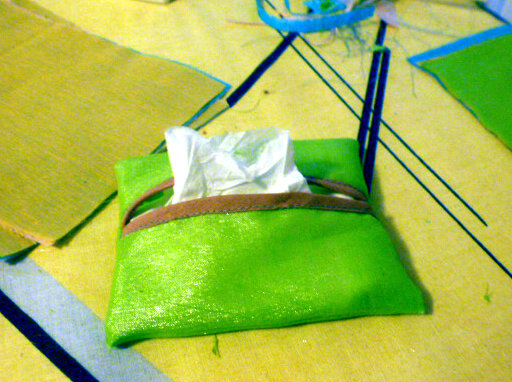
One souvenir I bought was a cute purse-pack tissue holder. In the back of my mind, I always knew that I could make these myself. This summer, I finally sat down and made several of them as gifts for my nieces, all of whom have birthdays in the same month.
This is a very simple project, and you can even make it by hand if you don’t have a sewing machine.
Materials:
- fabric scraps
- double-fold bias tape (optional, for bordering the pouch opening)
- thread
- scissors
- iron-on decals (optional, for decoration)
- purse pack of tissue
Instructions:
- Cut fabric into a 7×5 rectangle.
- Cut two pieces of the bias tape into 5 inches.

- Open the bias tape and pin it down to the wrong side of the fabric.
- Sew to one short end of fabric, using the crease in the tape as a guide.
- Flip the bias tape to the right side of fabric, pin and sew in place.
- Fold the fabric, wrong side out, placing the two pieces of bias tape side by side.
- Pin in place and sew 1/4 inch seam across each short end.
- Clip corners.

- Turn right side out, insert a tissue pack, and embellish with an iron-on decal for a personal touch.
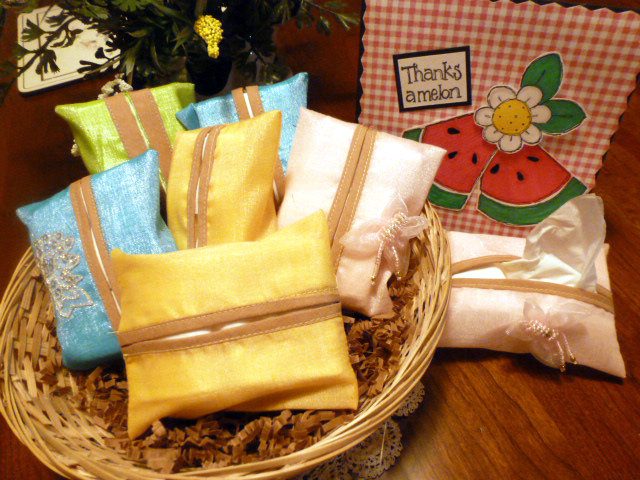
There’s so much you can do to individualize each one. Use ric-rac or lace on the opening. Embroider an initial or name. Quilt it. It’s a fun, easy project, and you can make several of them in a few hours.
Have a great week, my friends! xo

What a clever gift! I didn’t know there was such a thing as an iron-on decal…
Iron-on decals – for the embroidery-challenged (or lazy). haha xo
Dearest Stacy,
What a lovely purse-pack tissue holders to give as a gift!
So glad that you too got to go to Japan. In 2007 I did as a chaperon with six teenagers. If you put in the word ‘Chaperon’ in my search box, top right on my blog you find posts about it…
Sending you summer hugs,
Mariette
My daughter was a teen at the time, and she fell in love with Japan. Such a friendly place, even for youngsters. xo
Quite a neat idea. I wonder if felted ones would work?
I believe they would, Bonnie. xo
What a cool gift for your relatives! I wouldn’t mind going to Japan. Or anywhere similar…
The Orient is an interesting place. My favorite part of Tokyo was the “Shibuyah” district – there’s nothing else like it! xo